Blueprint
Installed. Now what?
Five steps to a blueprint you will use every week. If anything here does not match what is on your screen, that is our mistake — write to support@billboard.plus and we will fix it.
Before you start
One thing, and it catches people: monday only creates a board’s subitems structure the first time somebody adds a subitem by hand.
If your board has never had a subitem on it, add one to any item, once. monday makes the hidden board that holds subitems at that moment, and its columns are what a blueprint fills in. Blueprint will tell you if this is needed rather than showing you an empty picker.
The first ten minutes
In the order you will actually do them.
- 1
Add the board view
On the board you want blueprints for, press the plus beside Main table, choose Apps, and pick Blueprints. That is where you build them. One-time, per board.
- 2
Write the steps
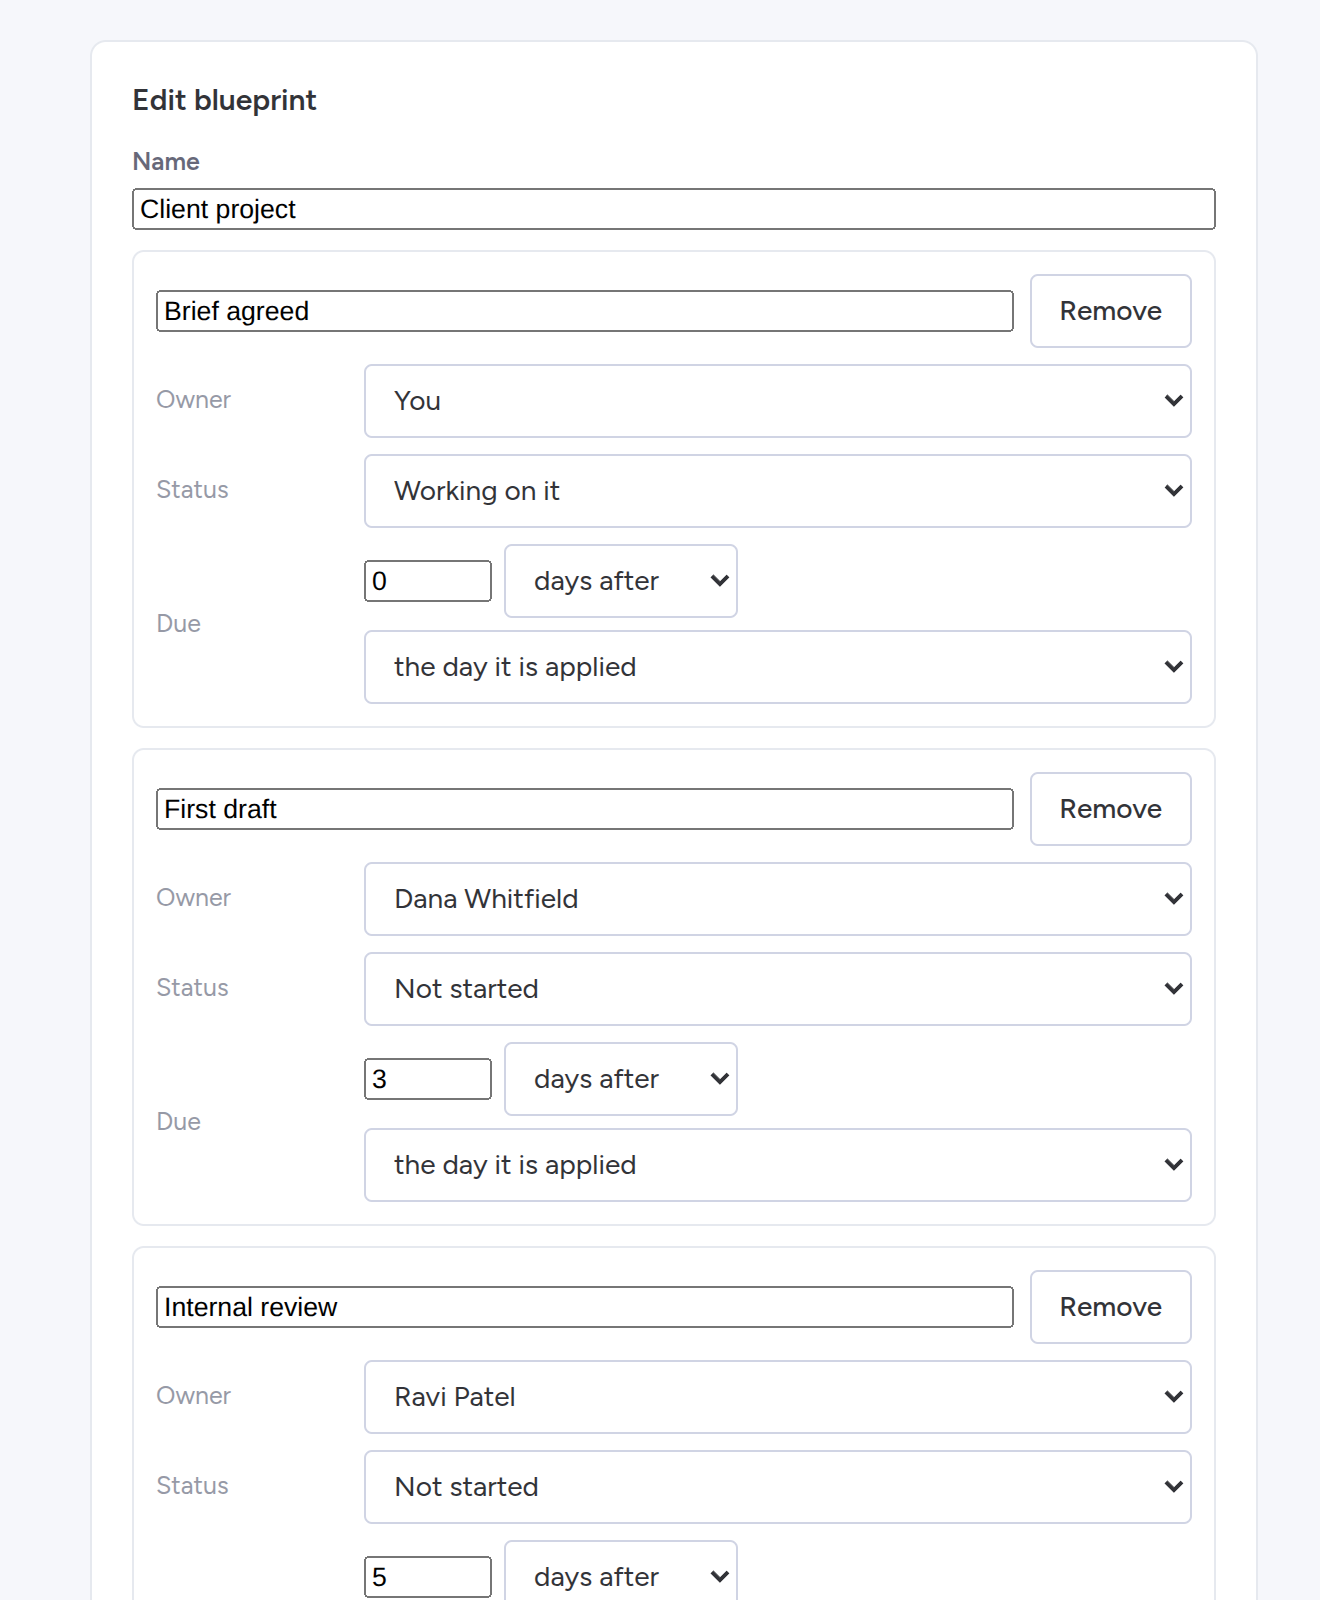
Press New blueprint and name it after the work — “Client project”, “New starter”, “Rev C drawing”. Then add a step for each thing that always happens, in the order it happens.
- 3
Fill in the values, which is the point
Each step can set every column your subitems have: who owns it, what status it starts in, a number, a piece of text. A blueprint that only sets names saves you the typing and none of the deciding.
- 4
Say when, as an offset
A step’s date is counted — three days after the day it is applied, or five days before the item’s own due date. Never a fixed date, because a fixed date is right once and wrong every time afterwards.
- 5
Apply it
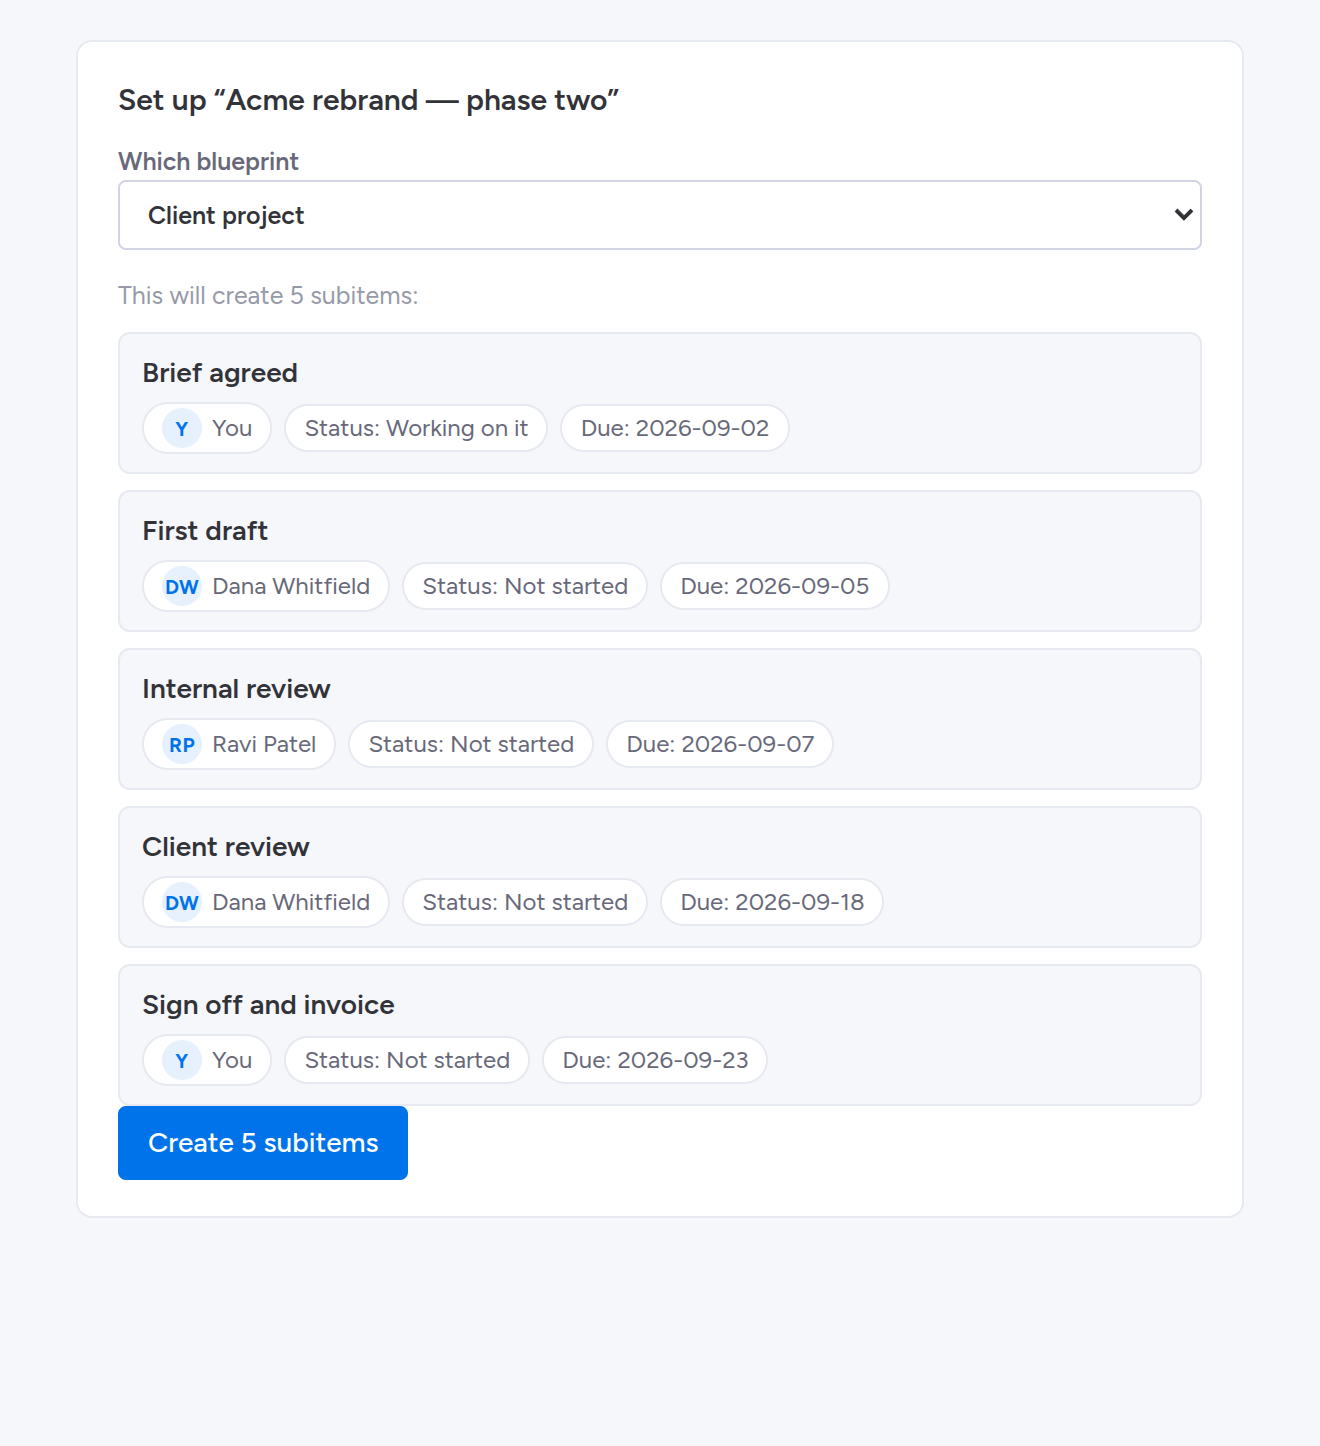
Open any item, choose the blueprint, and look at what it is about to create: every row with its owner, status and worked-out date. Then press the button.
Why the dates are offsets
“Three days after we start” and “five days before it is due” are both ordinary things to mean.
Each step counts from one of three things: the day the blueprint is applied, the item’s own start date, or its due date. Counting backwards from the due date is what lets a blueprint say “client review five days before delivery” and still be right on the next job, with different dates.
If a step counts from the item’s own date and the item has none, Blueprint says so and creates that step without a date rather than inventing today’s.
You see it before it happens
Because a structure created by surprise has to be deleted one row at a time.
Choosing a blueprint on an item shows exactly what it will create — every row, with the owner, the status and the date already worked out. If the board is missing a column the blueprint sets, it says which one and creates everything else.
What each permission is used for
monday’s consent screen states these in its own words, which are broader than what the app does.
- Read your profile information
- To know who is building and applying blueprints.
- Read all of your boards data
- To offer the people on the board as owners, and to read which columns your subitems have.
- Modify any of your boards’ data
- To create the subitems, with the values you set. This is the whole of what it writes: it never edits an item you already have.
A promise about price
Anything free today stays free on your plan for as long as you are on it. We will not move something you already use behind a higher tier, and we will not turn a free plan into a paid one and keep your work behind it. Your blueprints live in your own monday account, so even if we broke this you could still read every one of them.